Work with images
Load an image
The pyagme.image module provides methods for loading and saving
images. The method load() loads an image from the file system
and returns a Surface object. The method convert() optimizes the
image format and makes drawing faster:
img = pygame.image.load('bird.png')
img.convert()
Download the image bird.png to the same folder where your program resides:
The method get_rect() returns a Rect object from an image.
At this point only the size is set and position is placed at (0, 0).
We set the center of the Rect to the center of the screen:
rect = img.get_rect()
rect.center = w//2, h//2
To recapitulate, we are working with 3 objects:
- screen is the Surface object representing the application window
- img is the Surface object of the image to display
- rect is the Rect object which is the bounding rectangle of the image
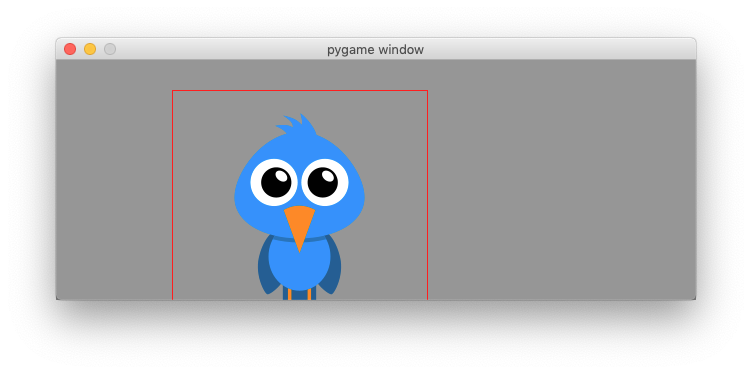
To display the image we fill the screen with a background color (GRAY). Then we blit the image, draw a red rectangle around it and finally update the screen:
screen.fill(GRAY)
screen.blit(img, rect)
pygame.draw.rect(screen, RED, rect, 1)
pygame.display.update()
Move the image with the mouse
At the beginning of the programm we set a boolean variable moving to False.
Only when the mouse button is pressed, and when the mouse position is within the image (collidepoint) we set it to True:
elif event.type == MOUSEBUTTONDOWN:
    if rect.collidepoint(event.pos):
        moving = True
When the mouse button is released, we set it to False again:
elif event.type == MOUSEBUTTONUP:
    moving = False
When the mouse moves, and the flag moving is True, then we move the image
by the amount of relative movement (event.rel):
elif event.type == MOUSEMOTION and moving:
    rect.move_ip(event.rel)
This is the whole code:
"""Move an image with the mouse."""

import pygame
from pygame.locals import *

RED = (255, 0, 0)
GRAY = (150, 150, 150)

pygame.init()
w, h = 640, 240
screen = pygame.display.set_mode((w, h))
running = True

img = pygame.image.load('bird.png')
img.convert()
rect = img.get_rect()
rect.center = w//2, h//2
moving = False

while running:
    for event in pygame.event.get():
        if event.type == QUIT:
            running = False

        elif event.type == MOUSEBUTTONDOWN:
            if rect.collidepoint(event.pos):
                moving = True

        elif event.type == MOUSEBUTTONUP:
            moving = False

        elif event.type == MOUSEMOTION and moving:
            rect.move_ip(event.rel)

    screen.fill(GRAY)
    screen.blit(img, rect)
    pygame.draw.rect(screen, RED, rect, 1)
    pygame.display.update()

pygame.quit()
Rotate and Scale the image
The pygame.transform module provides methods for scaling, rotating and flipping
images. As we are going to modify the image img we keep the original image
in a variable called img0:
img0 = pygame.image.load(path)
img0.convert()
In order to show the image rectangle, we add a green border to the original image:
rect0 = img0.get_rect()
pygame.draw.rect(img0, GREEN, rect0, 1)
Then we place the place the image in the center of the screen:
center = w//2, h//2
img = img0
rect = img.get_rect()
rect.center = center
First we define the global variables scale and angle:
angle = 0
scale = 1
We use the R key to increment rotation by 10 degrees and
(decrement if the SHIFT key is pressed). The function rotozoom() allows to combine
rotation and scaling. We always transform the orignial image (img0). Repeated rotation or scaling of
an image would degrade its quality:
if event.type == KEYDOWN:
    if event.key == K_r:
        if event.mod & KMOD_SHIFT:
            angle -= 10
        else:
            angle += 10
        img = pygame.transform.rotozoom(img0, angle, scale)
We use the S key to increment the scale by 10% (decrease if the SHIFT key is pressed):
elif event.key == K_s:
        if event.mod & KMOD_SHIFT:
            scale /= 1.1
        else:
            scale *= 1.1
        img = pygame.transform.rotozoom(img0, angle, scale)
As the image is transformed the bounding rectangle changes size. It must be recalulated and placed at the center again:
rect = img.get_rect()
rect.center = center
Reset the image to the original
We use the O key to reset the image to its original state:
elif event.key == K_o:
    img = img0
    angle = 0
    scale = 1
Flip the image
We use the H key to flip the image horizontally:
elif event.key == K_h:
    img = pygame.transform.flip(img, True, False)
and the V key to flip the image vertically:
elif event.key == K_v:
    img = pygame.transform.flip(img, False, True)
Detect edges with the Laplacian
The fonction laplacien(img) allows to detect the outline of the image:
elif event.key == K_l:
    img = pygame.transform.laplacian(img)

The fonction scale2x(img) doubles the size of a pixel:
elif event.key == K_2:
    img = pygame.transform.scale2x(img)
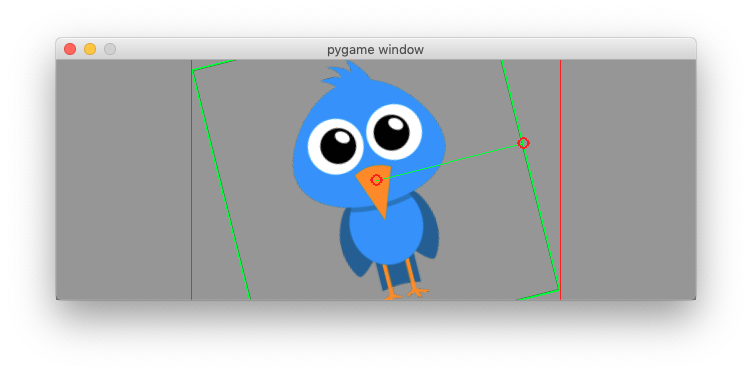
Transform the image with the mouse
In this section we show how to use the mouse to scale and rotate an image.
At the beginning we import the math module:
import math
At the beginning we store the initial mouse position:
mouse = pygame.mouse.get_pos()
When the mouse moves we update the mouse position mouse and calculate the x, y coordinates
from the center of the image.
We also calculate the center-mouse distance d
elif event.type == MOUSEMOTION:
    mouse = event.pos
    x = mouse[0] - center[0]
    y = mouse[1] - center[1]
    d = math.sqrt(x ** 2 + y ** 2)
The atan2(y, x) math function allows to find the rotation angle. We need to
transform radians in degrees. From the distance mouse-center we calculate the
scale argument:
angle = math.degrees(-math.atan2(y, x))
scale = abs(5 * d / w)
img = pygame.transform.rotozoom(img0, angle, scale)
rect = img.get_rect()
rect.center = center
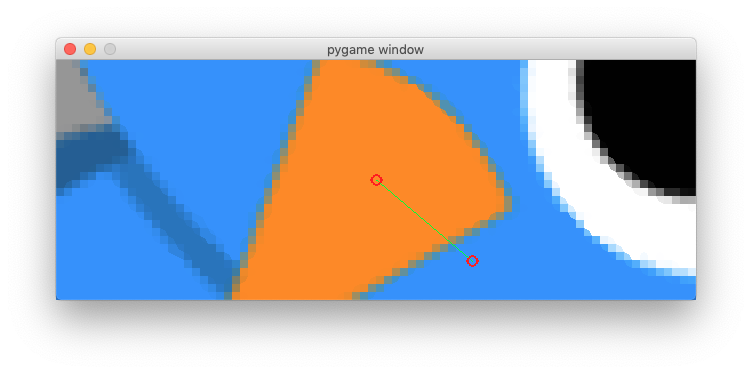
To finally draw the transformed image we first fille the whole screen background (GRAY), blit the transformed image, surround it with a red rectangle.
In order to give visual feedback for the mouse action when transforming an image, we
draw a green line between the center of the image and the mouse position,
place two circles on the center and on the mouse position:
screen.fill(GRAY)
screen.blit(img, rect)
pygame.draw.rect(screen, RED, rect, 1)
pygame.draw.line(screen, GREEN, center, mouse, 1)
pygame.draw.circle(screen, RED, center, 6, 1)
pygame.draw.circle(screen, RED, mouse, 6, 1)
pygame.display.update()
Here is the full code.
"""Rotate, scale and flip an image."""

import pygame
import math, sys, os
from pygame.locals import *

RED = (255, 0, 0)
GREEN = (0, 255, 0)
GRAY = (150, 150, 150)

pygame.init()
w, h = 640, 240
screen = pygame.display.set_mode((w, h))
running = True

module = sys.modules['__main__']
path, name = os.path.split(module.__file__)
path = os.path.join(path, 'bird.png')

img0 = pygame.image.load(path)
img0.convert()

# draw a green border around img0
rect0 = img0.get_rect()
pygame.draw.rect(img0, GREEN, rect0, 1)

center = w//2, h//2
img = img0
rect = img.get_rect()
rect.center = center

angle = 0
scale = 1

mouse = pygame.mouse.get_pos()

while running:
    for event in pygame.event.get():
        if event.type == QUIT:
            running = False

        if event.type == KEYDOWN:
            if event.key == K_r:
                if event.mod & KMOD_SHIFT:
                    angle -= 10
                else:
                    angle += 10
                img = pygame.transform.rotozoom(img0, angle, scale)

            elif event.key == K_s:
                if event.mod & KMOD_SHIFT:
                    scale /= 1.1
                else:
                    scale *= 1.1
                img = pygame.transform.rotozoom(img0, angle, scale)

            elif event.key == K_o:
                img = img0
                angle = 0
                scale = 1

            elif event.key == K_h:
                img = pygame.transform.flip(img, True, False)

            elif event.key == K_v:
                img = pygame.transform.flip(img, False, True)

            elif event.key == K_l:
                img = pygame.transform.laplacian(img)

            elif event.key == K_2:
                img = pygame.transform.scale2x(img)

            rect = img.get_rect()
            rect.center = center

        elif event.type == MOUSEMOTION:
            mouse = event.pos
            x = mouse[0] - center[0]
            y = mouse[1] - center[1]
            d = math.sqrt(x ** 2 + y ** 2)

            angle = math.degrees(-math.atan2(y, x))
            scale = abs(5 * d / w)
            img = pygame.transform.rotozoom(img0, angle, scale)
            rect = img.get_rect()
            rect.center = center

    screen.fill(GRAY)
    screen.blit(img, rect)
    pygame.draw.rect(screen, RED, rect, 1)
    pygame.draw.line(screen, GREEN, center, mouse, 1)
    pygame.draw.circle(screen, RED, center, 6, 1)
    pygame.draw.circle(screen, RED, mouse, 6, 1)
    pygame.display.update()

pygame.quit()